PROGRAMMING GRAPHICS
Hello, Jupylet!
We begin with the simplest Jupylet app. It displays a scolling banner with the string “hello, world”. You can find the notebook at examples/02-hello-jupylet.ipynb.
Note
If you click the link above it will take you to a copy of the notebook at
github.com. That copy is static - you can read it but you can’t run it. If
you would like to run the notebook and experiment with it, open a command
console as explained in Let's get started! enter
the jupylet/examples/ directory and type:
jupyter notebook 02-hello-jupylet.ipynb
Note
To understand the code in this chapter you need to know about Python imports, functions, classes, and globals.
The code begins with two import statements that import the App
class which represents a game and the Label class which
we will use to display the text:
from jupylet.app import App
from jupylet.label import Label
Next, we create the game object and specify the width and height of the game canvas:
app = App(width=320, height=64)
And then we create a label:
hello = Label('hello, world', color='cyan', font_size=32, x=app.width, y=16)
The x and y coordinates of a label correspond approximately to its lower left corner. By setting the initial x position to app.width we effectively position the label just outside the right hand side of the game canvas in pixels.
The label color can be any name defined by the W3C SVG standard
or it can be any RGB color of the form "#abcdef" as explained here
https://www.color-hex.com/.
Next, we define a function to scroll the label from right to left. The
code @app.run_me_every(1/30) above the
function definition is called a decorator. Python decorators are kind of
“magical”, and this one will make Jupylet automatically call the
scroll() function once every 1/30 of a second, or 30 times per second,
once the game is run:
@app.run_me_every(1/30)
def scroll(ct, dt):
    hello.x = hello.x - 1
    if hello.right < 0:
        hello.x = app.width
The two function arguments ct and dt will contain the current game time and the time since the function was last called (delta time). We can use these arguments to do interesting stuff, but you can ignore them for now.
The function above does not actually draw the label in its new position,
rather it only updates the x property of the label. To draw the label in its
new position we need the render() function; it is a
special function responsible for drawing each new frame of the game video
while it is running. In this particular case it will clear the game canvas
(paint it black) and draw the label in its new position:
@app.event
def render(ct, dt):
    app.window.clear()
    hello.draw()
Finally we start the game by calling:
app.run()
If you run the notebook the game canvas should appear with the following animation:

Now that we’ve got “hello, world” under our belt we may proceed to more elaborate stuff.
Catch a Spaceship
Let’s take a look into a simple 2D game called Spaceship. You can find the notebook at examples/11-spaceship.ipynb.
The code in the spaceship notebook makes simple use of 2D sprites. A Sprite
is a bitmap image that can be drawn on the game canvas and can be manipulated
and animated. Let’s create one:
from jupylet.sprite import Sprite

circle = Sprite('images/yellow-circle.png', width=184)
alien = Sprite('images/alien.png', scale=0.5)
ship = Sprite('images/ship1.png', x=app.width/2, y=app.height/2, scale=0.5)
We create a sprite by specifying the path to an image on disk. For example here is the image that we use for our little spaceship:
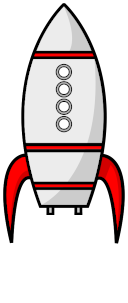
We can also specify the sprite’s x and y coordinates. By setting them to half the game canvas width and height, we effectively position the sprite in the middle of the game canvas.
Sprites have many more properties that we can set when we create them and later if we wish to modify them.
Note
Jupyter can conveniently show you the list of arguments accepted by a
function or by a class constructor, their default values and other
documentation. In the spaceship notebook, position your cursor anywhere
between the opening and closing parentheses of the Sprite()
constructor, then hold down the Shift key and press the
Tab key once or more.
For example, we can make the yellow circle sprite half transparent with the following code:
circle.opacity = 0.5
Next up is a more complex function to control the ship’s movement. Let’s see it and then unpack it line by line:
@app.run_me_every(1/60)
def update_ship(ct, dt):

    global vx, vy

    if left:
        ship.angle += 192 * dt

    if right:
        ship.angle -= 192 * dt

    if up:
        vx += 3 * math.cos(math.radians(90 + ship.angle))
        vy += 3 * math.sin(math.radians(90 - ship.angle))

    #
    # Update ship position according to its velocity.
    #

    ship.x += vx * dt
    ship.y += vy * dt

    ship.wrap_position(app.width, app.height)

    #
    # If ship touches alien, make the yellow alien circle visible.
    #

    if len(ship.collisions_with(alien)) > 0:
        circle.opacity = 0.5
    else:
        circle.opacity = 0.0
Let’s unpack it.
Our ship can turn left or right. We can make it turn left by incrementing its angle property and right by decrementing its angle property:
if left:
    ship.angle += 192 * dt

if right:
    ship.angle -= 192 * dt
The Python += operator increments the operand by the given amount
192 * dt. The variable dt (delta time) is a parameter of the
update_ship() function. It contains the time (in seconds) that elapsed
since the function was last called. By multiplying it with 192 we
effectively increment the ship’s angle by 192 degrees per second regardless
of how often the function is called (think about it).
The next bit of code is just as interesting:
if up:
    vx += 3 * math.cos(math.radians(90 + ship.angle))
    vy += 3 * math.sin(math.radians(90 + ship.angle))
We would like our spaceship to have a velocity and we would like to be able to accelerate the ship’s speed.
In our everyday language velocity and speed are synonyms but in physics they correspond to different concepts. Roughly speaking, in physics velocity is speed in a particular direction. We represent velocity in 2D space by keeping track of the ship’s horizontal velocity (vx) and its vertical velopcity (vy) separately and we call vx and vy the components of the velocity.
When we engage the ship’s rocket engine we would like it to accelerate in
the direction it is pointing. To compute that direction we read the
angle of the ship’s sprite and add 90 degrees,
because when the sprite angle is 0 the ship actually points up.
If you would like to understand more about the components of velocity and what cosine snd sine have to do with it, the Khan Academy has a nice post about it.
Once we have updated the velocity components we use them to update the ship’s x and y coordinates:
ship.x += vx * dt
ship.y += vy * dt
The problem with incrementing and decrementing the x and y coordinates
like that is that very quickly the ship will disappear from view. That’s what
the wrap_position() function is for. It will
modify the ship’s position such that if it goes out of the canvas from one
side it will show up again at the opposite side:
ship.wrap_position(app.width, app.height)
The function ends with a bit of code that checks if our little spaceship collides with the alien sprite and if it does it shows a half transparent yellow circle sprite:
if len(ship.collisions_with(alien)) > 0:
    circle.opacity = 0.5
else:
    circle.opacity = 0.0
The collisions_with() function call checks if the
ship sprite collides with the alien sprite and returns a list with contact
points. If all we care about is whether they collide or not we can simply
test if the length of the returned list is greater than 0 (think about it).
If the spaceship and the alien do not collide, we hide the yellow circle by setting its opacity to 0.0 making it fully transparent.
Handling Keyboard and Mouse Events
In programming and in particular in game programming, pressing keys on the keyboard or clicking the mouse and moving it around the screen is often represented as a stream or sequence of events.
For example, as the mouse is moved around the game canvas a sequence of events with updated mouse positions is continuously generated and processed.
To handle this stream of events we create an event handler. The spaceship game includes such a function to handle mouse position events. Here it is:
@app.event
def mouse_position_event(x, y, dx, dy):

    alien.x = x
    alien.y = y

    circle.x = x
    circle.y = y
The function begins with the special decorator @app.event.
This decorator makes sure our function is recorgnized as the handler for the
mouse_position_event(). The function itself is pretty
simple. It just sets the position of the alien sprite and the yellow circle
sprite behind it to that of the mouse cursor.
Here is a more complicated hander. The spaceship keyboard handler:
@app.event
def key_event(key, action, modifiers):

    global up, left, right

    keys = app.window.keys

    if action == keys.ACTION_PRESS:

        if key == keys.UP:
            ship.image = 'images/ship2.png'
            up = True

        if key == keys.LEFT:
            left = True

        if key == keys.RIGHT:
            right = True

    if action == keys.ACTION_RELEASE:

        if key == keys.UP:
            ship.image = 'images/ship1.png'
            up = False

        if key == keys.LEFT:
            left = False

        if key == keys.RIGHT:
            right = False
Let’s go over the parameters of the key_event() function.
The key parameter tells us which keyboard key this event is all about;
the action parameter tells us whether it was pressed or released; and
the modifiers parameter tells us wheter any of the SHIFT, ALT,
or CTRL keys were held down during the event.
Note that you should not directly compare the key argument to letters and
symbols, rather you should compare it to special predefined constants - in
this case keys.LEFT, keys.UP, and keys.RIGHT.
We use the handler to keep track of which arrow keys are being held down. We accomplish that with global variables that hold the current state of keys. When a key is pressed we set the corresponding global variable to True, and when it is released we set the corresponding global variable to False.
When we press the up arrow we engage the spaceship engines, a yellow
propulsion jet appears at the end of the rocket engine nozzle, and the ship
accelerates. We achieve the visual effect with the statement
ship.image = 'images/ship2.png' which changes the sprite’s bitmap image
to that of a spaceship with a visible propulsion jet.